
Custom connectors work on every Claude plan (on the Free plan you can have one). It takes about two minutes, in Claude on the web or in the Claude desktop app.
1. Add the connector
- In Claude, open Customize in the left menu, then Connectors.
- Click Add, then Add custom connector.
- Name:
PPCDATAFEED. MCP server URL:https://app.ppcdatafeed.com/mcp. Click Continue. - Keep the sign-in settings Claude finds and click Add.

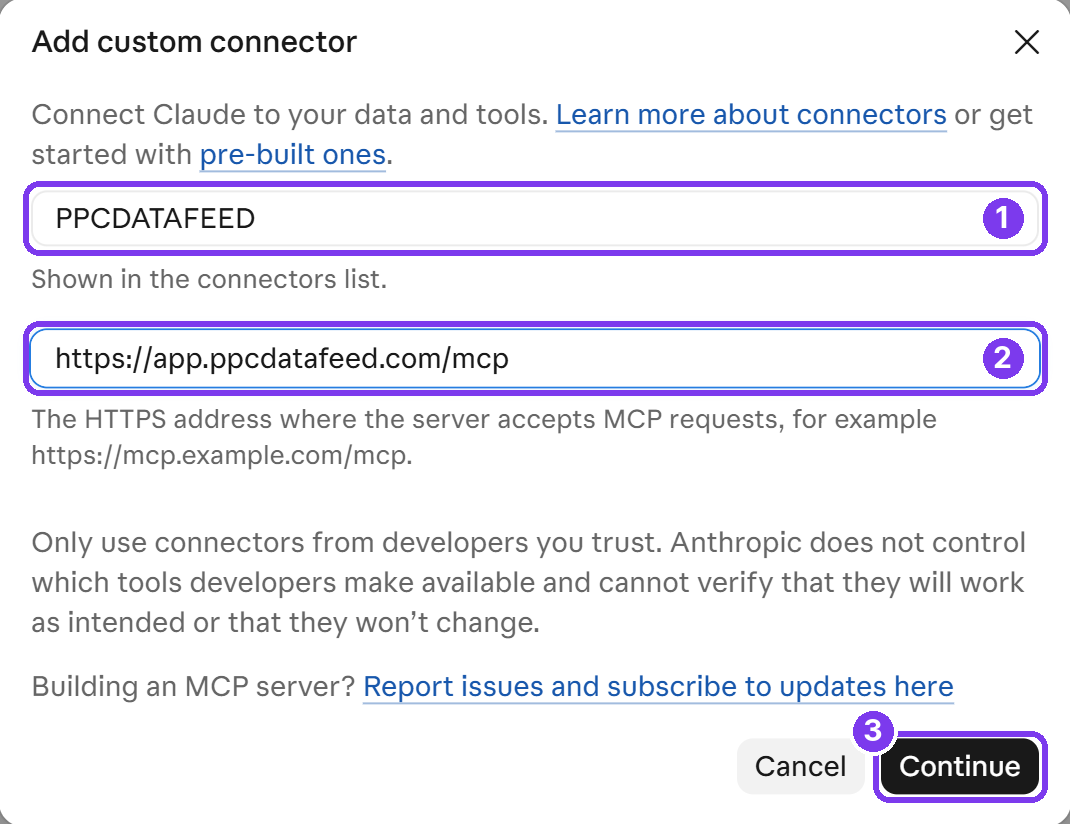
On a Team or Enterprise plan, an Owner adds the connector once under Organization settings > Connectors. Everyone else finds PPCDATAFEED in Customize > Connectors and clicks Connect.
2. Sign in and press Allow
Claude opens the PPCDATAFEED sign-in. Sign in with your PPCDATAFEED account, read what the AI will be able to do and press Allow. PPCDATAFEED now shows as connected in Claude, and Claude shows up in the app under Integrations > AI assistants.
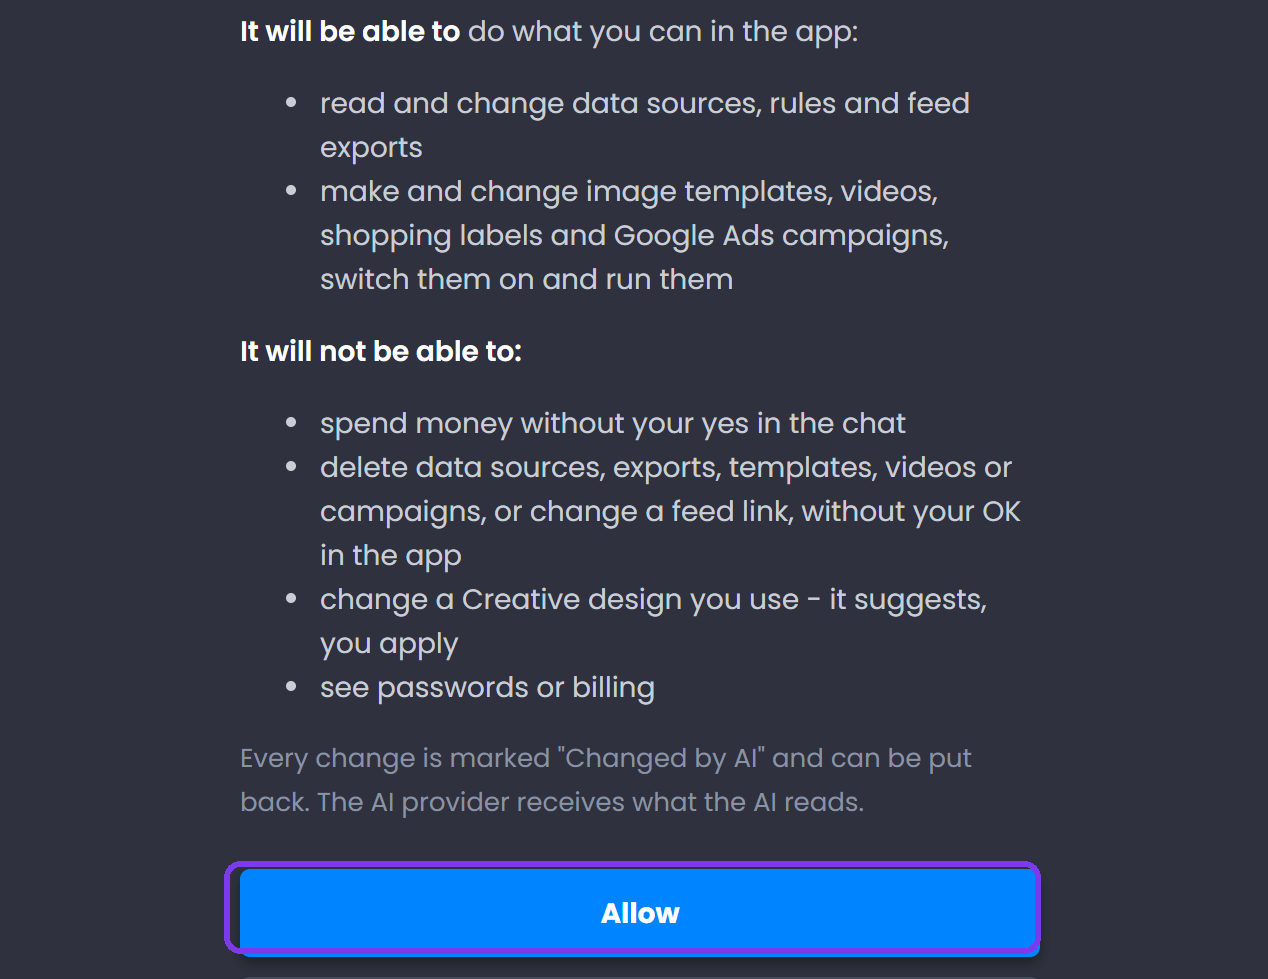
3. Use it in a chat
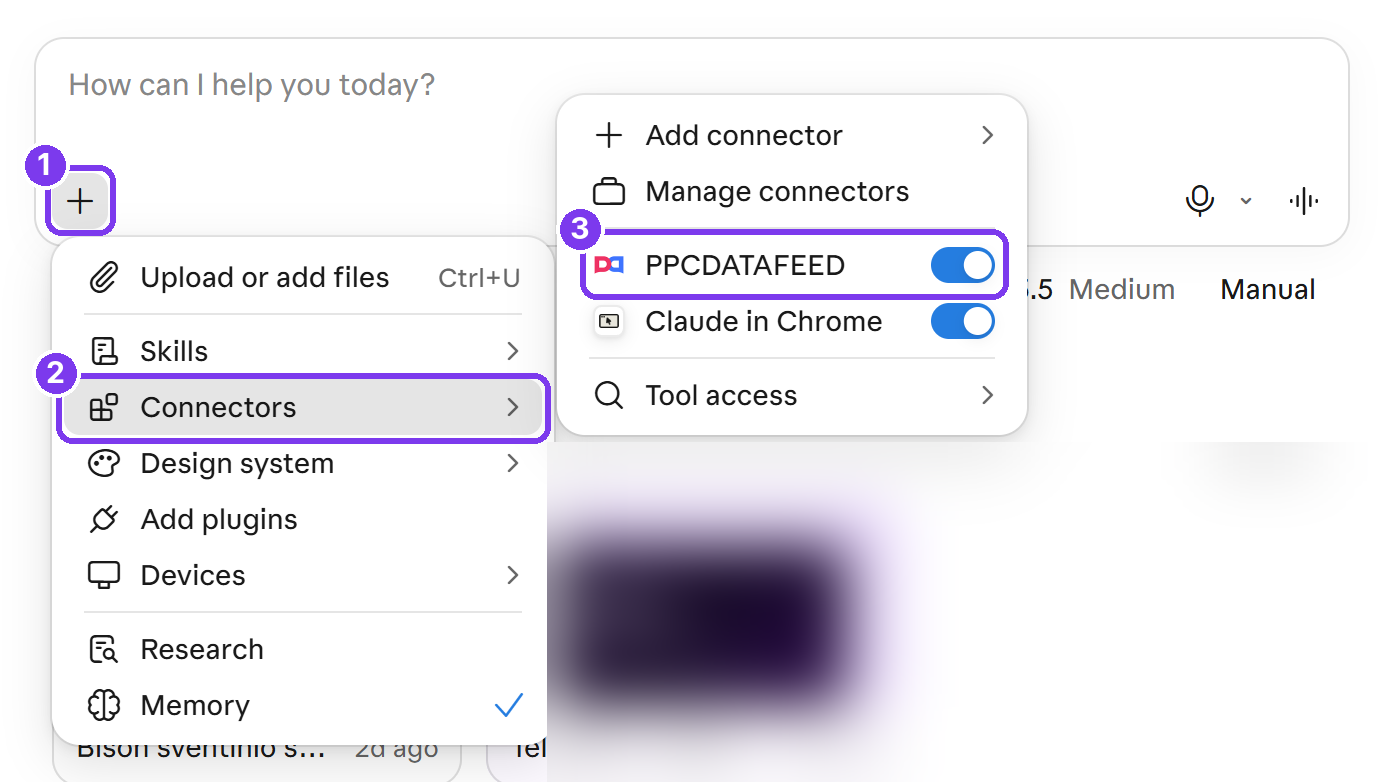
- Start a new chat and click + under the message box.
- Open Connectors and switch PPCDATAFEED on.
- Ask in plain words, for example: "List my data sources and tell me which ones failed their last update."
Before it uses PPCDATAFEED, Claude asks you: Allow once, Always allow or Decline. Always allow stops the question for that tool.
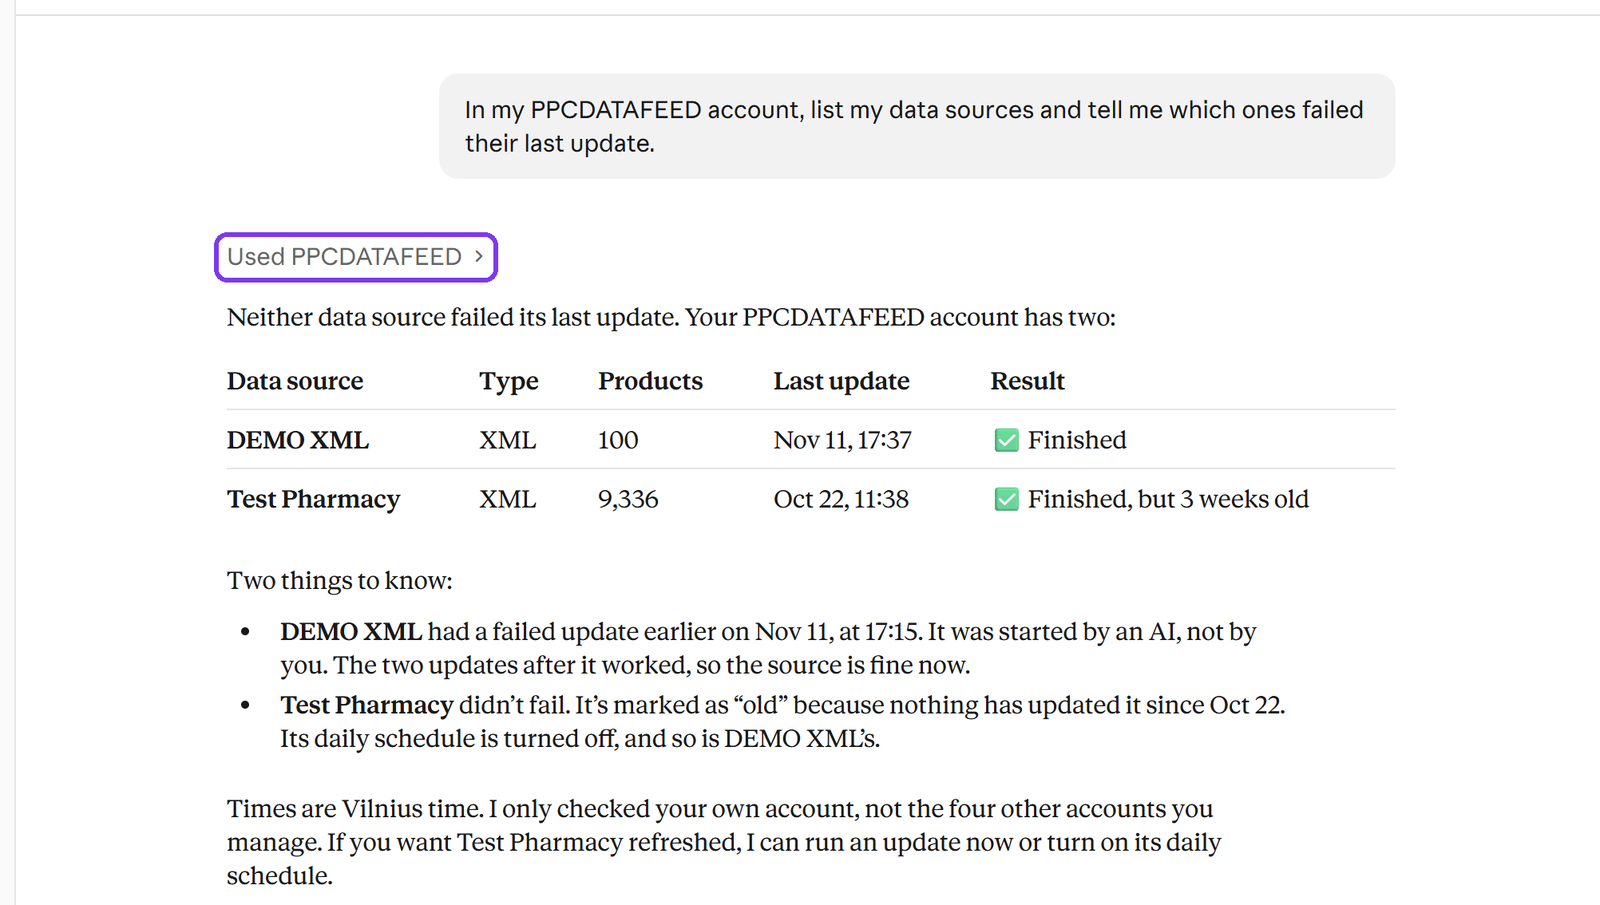
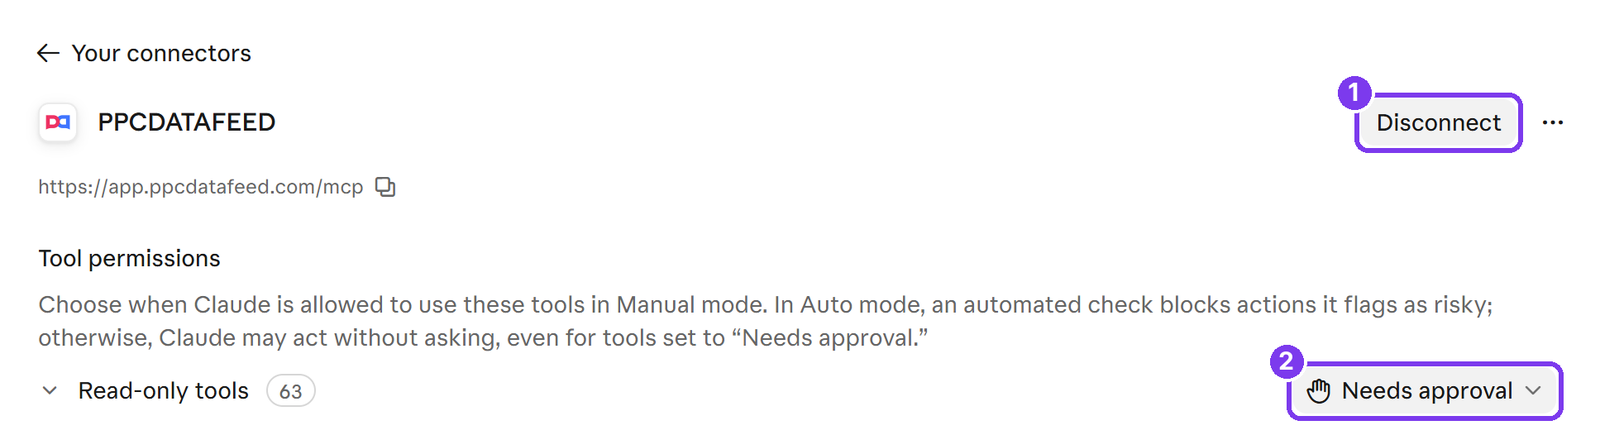
Claude asks before every tool by default, even for reading. To let it read without asking, open Customize > Connectors > PPCDATAFEED and change Read-only tools from Needs approval. Keep changes on Needs approval if you want to see each one first.
Disconnect
In Claude: Customize > Connectors > PPCDATAFEED > Disconnect. Or in the app: Integrations > AI assistants, the bin icon next to Claude.
Next steps
Need help? Contact us.